Your brass fixtures aren’t destined for a dull future. Sure, they might currently look as though they’re quietly surrendering to time, air, and that bathroom humidity we all pretend not to notice. But fear not; a rescue mission is absolutely within reach.
With the right tricks up your sleeve, your tired-looking brass can go from ‘oh dear’ to ‘oh wow.’ Ready to bring back the shine? Let’s dive in.
Understanding Brass and Its Properties
Before you jump in with cloths, pastes, and good intentions, it helps to get acquainted with the star of the show.
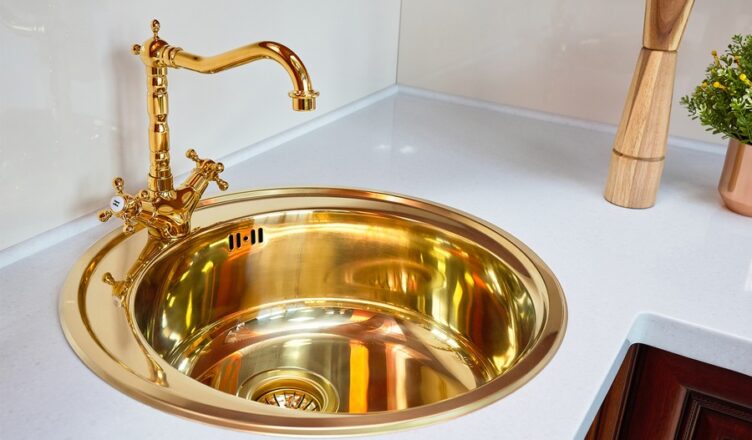
Brass isn’t just any metal; it’s a rather charming blend of copper and zinc that looks fantastic when well cared for.
Unfortunately, this metallic marvel does have one tiny weakness. Air and moisture slowly nibble away at brass’s natural shine, leaving behind that familiar dull, tarnished look.
Now, here’s where things get interesting. Brass typically comes in two varieties: coated and uncoated. Coated brass has a protective layer that does a lot of the heavy lifting for you, while uncoated brass is a bit more high-maintenance and needs gentler handling.
Once you crack their code, you’ll unlock the secret to keeping them looking absolutely breathtaking.
Choosing the Right Solutions
Now, it’s time to gather the tools that’ll help you win the shine game. Luckily, you don’t need to embark on an expensive shopping spree or get a degree in chemistry.
In fact, most of what you need is probably already sitting in your kitchen, waiting to become part of your next home-improvement project.
Household Ingredients
Vinegar, lemon juice, and baking soda aren’t just for cooking and the occasional science-fair volcano.
Their natural properties work wonders on tarnish, gently dissolving the dullness without you having to scrub. Whether you prefer to pair them or use them solo, they’re surprisingly effective at removing stains from uncoated brass.
Commercial Cleaners
If you prefer something more ready to go or you simply feel fancy, commercial brass cleaners are a great option.
Just make sure the label promises a gentle touch. You want your cleaner to just lift tarnish, not scratch your surfaces in the process.
Eco-Friendly Options
For those who like their metal shiny and their conscience clear, there are plenty of green cleaning products designed to be kinder to both brass and the planet. They tend to be mild, effective, and free from harsh chemicals, which is a win all around.
Before you start slathering anything onto your fixtures, though, do a quick patch test in a hidden spot. It’s the brass-care equivalent of checking the weather before hanging out your laundry: a small precaution that saves you from unnecessary damage later on.
Step-by-Step Cleaning Process
Your supplies are ready, your brass surfaces are bracing themselves, and it’s time to begin. Here’s the smoothest route to a clean, refreshed shine:
- Gather your tools. Grab a soft microfibre cloth and slip on a pair of gloves. The cloth will keep scratches at bay, and the gloves will save your hands from the vinegar-and-baking-soda spa they never asked for.
- Prep your cleaner. If you’re going the homemade route, stir together equal parts lemon and baking soda or use vinegar on its own.
- Apply gently. Smooth the cleaner onto the uncoated brass using light, circular motions.
- Let it sit. Give the cleaner a few minutes to work its magic. It’ll soften the tarnish while you enjoy a cuppa.
- Rinse and dry. Rinse the brass with warm water, then dryit thoroughly with a clean cloth.
- Dispose responsibly. If you opted for a commercial cleaner, follow the disposal instructions on the label. It’s a tiny step that will prevent any unintended environmental plot twists.
Polishing Techniques for a Brilliant Shine
Are you ready to make your brass shine brighter than a disco ball? Your trusty microfibre cloth is about to become your new best friend.
If you have a splash of olive oil in the kitchen, dab a bit on for that glossy finish that will make your brass look like it just popped out of a luxury magazine. Alternatively, the store-bought polish works like a charm, too.
The secret ingredient is in the technique. Rub that polish in tiny circles instead of scrubbing. Make this a monthly routine, and your brass will thank you by looking absolutely spectacular.
Preventing Tarnish
With your brass now gleaming like it’s ready for a close-up, the next step is making sure it stays that way.
Humidity, fingerprints, and even the air itself can encourage brass to lose its sparkle, so a quick refresh now and then goes a long way. To prevent tarnish from sneaking in, especially on the pieces you handle often, gently wash your pieces with mild soap and warm water.
Protective finishes can also make life easier. You can apply a clear lacquer or a light layer of polish to shield the surface against moisture and dust.
Storage matters too, especially if you’re putting pieces away for a while. Keep brass in a dry, covered spot, away from direct sunlight and temperature changes.
And if you’re caring for antiques or particularly delicate items, there’s no shame in calling in expert cleaners. They have the tools and the steady nerves to clean brass safely without risking damage.
When to Replace Your Fixtures
Even with the best care, there comes a moment when brass stops giving ‘classic charm’ and starts edging dangerously close to ‘mysterious object found in a forgotten attic.’
If a fixture is heavily damaged, structurally compromised, or costing you more time and effort than it’s worth, replacing it can feel wonderfully freeing.
Modern alternatives, like brushed nickel or stainless steel, offer a clean, contemporary look with far less upkeep. They may not have brass’s warm glow, but they bring a certain sleek reliability that’s hard not to appreciate.
Think of it as allowing your space permission to evolve and giving yourself permission to stop wrestling with a piece that’s determined to stay stubborn.
Conclusion
Brass might not ask for much, but it absolutely loves a bit of attention. With a sprinkle of clever tricks, your fixtures can go from zero to hero faster than you’d imagine.
So, polish your surfaces when you can, protect them when it’s needed, and enjoy the satisfaction of watching your fixtures shine thanks to your handiwork.